Tomorrow's the big day as I finally will show you the pictures of the new bedroom of my little nieces.
Demain c'est le grand jour puisque je vous montrerai enfin les photos de la nouvelle chambre de mes petites nièces.

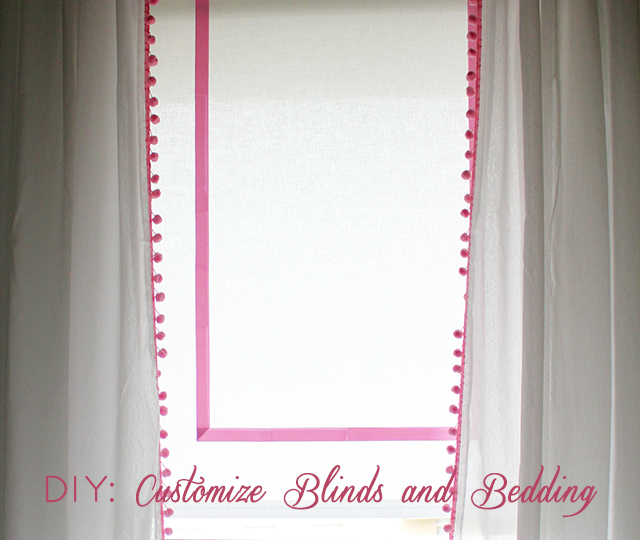
In the meantime, here are two simple DIY I made to decorate this room. As you know, it was a low budget makeover but I think that fabrics are very important in any room. Unfortunately if you want pretty curtains or beautiful bed linen prices can quickly rise. So the solution I found was to customize blinds, curtains and bed linen that I bought from Ikea to make something more "Precious" if I may say.
En attendant, voici deux petits DIY simples que j'ai réalisé pour décorer cette chambre. Comme vous le savez, il s'agissait d'un relooking à petit budget mais je pense que les tissus sont très importants et ce dans n'importe quel pièce. Malheureusement si l'on veut de jolis rideaux ou du beau linge de lit les prix peuvent vite monter. La solution que j'ai donc trouvé a été de customiser des stores, rideaux et parures de lit que j'ai acheté chez Ikea pour en faire quelque chose de plus "Précieux" si je puis dire.

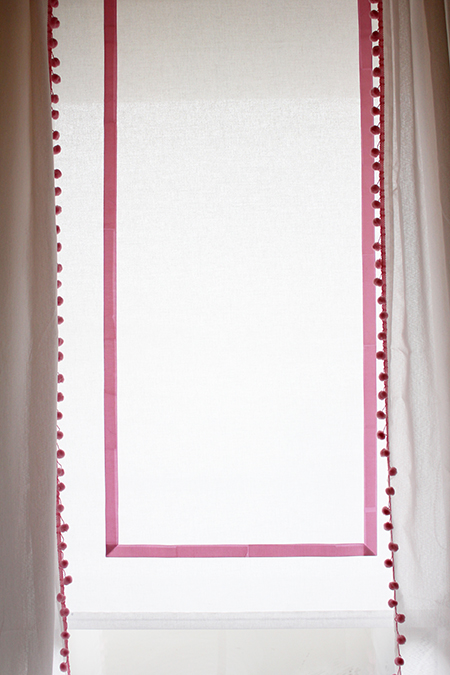
To make the first DIY, just take an Ikea Isdans blind and open it completely. To customize it you will need grosgrain ribbon the color of your choice and double-sided tape.
Pour réaliser le premier DIY, il suffit de prendre un store Isdans d'Ikea et de l'ouvrir entièrement. Pour le customiser il vous faudra du ruban gros grain de la couleur de votre choix et de l'adhésif double-face.

Draw a light line using a pencil where you want to put the ribbon.
Tracez un trait de crayon léger à l'endroit où vous voulez positionner votre ruban.

Take your ribbon and double-sided tape and start applying from the top of the blind following the line.
Prenez votre ruban et l'adhésif double-face et commencer à coller à partir du haut du store en suivant le tracé.

Keep on applying like that along the entire length of the line.
Continuer ainsi sur toute la longueur du tracé.

And here is your new blind! It is prettier than a simple all white blind, isn't it?
Et voilà votre nouveau store ! C'est plus joli qu'un simple store blanc non ?

For the curtains, I really liked the bed tent canopy that Erika made for her daughter. She customized the Ikea Vivan curtains with pom pom fringe. I did the same here but instead of using hot glue as she did I sewed the pom pom fringe with my sewing machine.
Pour les rideaux, j'avais bien aimé l'idée du ciel de lit qu'Erika avait réalisé pour sa fille. Elle avait customisé les rideaux Vivan d'Ikea avec un frange de pompons. J'ai fait ici la même chose mais au lieu d'utiliser un pistolet à colle chaude comme elle l'avait fait, j'ai cousu la frange de pompons à l'aide de ma machine à coudre.

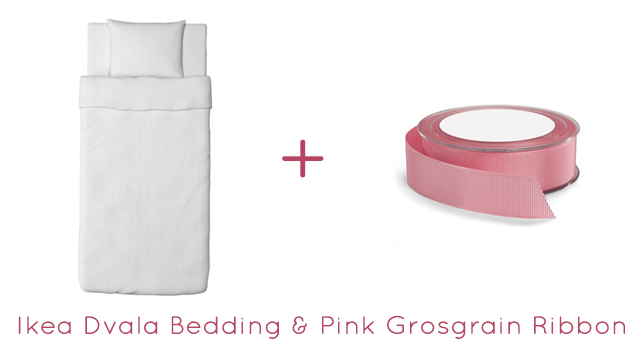
Finally, for the bed linen I bought the Ikea Dvala duvet cover and pillow case that I also customized with the same pink grosgrain ribbon. No double-sided tape this time of course! I first put thermofoil to prevent the ribbon from moving and make sewing easier. And I sewed the grosgrain ribbon on the duvet cover, but also on pillowcase.
Enfin, pour le linge de lit, j'ai pris une parure de lit Dvala que j'ai également customisée avec le même ruban gros grain rose. Pas d'adhésif double-face cette fois-ci bien entendu ! J'ai d'abord fixé mon ruban à l'aide de thermocollant pour qu'il ne bouge plus et rendre le travail de couture plus facile. Et j'ai cousu le ruban gros grain sur la housse de couette mais également sur la taie d'oreiller.

But I will not show you more ... See you tomorrow for the Before/After this room!
Mais je vous en montre pas plus... Alors à demain pour l'Avant/Après de cette chambre !


12 juin 2013 - 14 h 15 min
Absolutely OBSESSED with these blinds! What a great and affordable alternative to expensive roman shades but so much more chic than your average roller shade. Love love love.
12 juin 2013 - 15 h 35 min
Happy that you like these blinds! Affordable items can also be very chic ;)
13 juin 2013 - 18 h 06 min
too perfect!!! you are brilliant!
19 juin 2013 - 11 h 38 min
[…] En attendant, voici deux petits DIY simples que j'ai réalisé pour décorer cette chambre. Comme vous le savez, il s'agissait d'un relooking à petit budget mais je pense que les tissus sont très importants et ce dans n'importe … […]
27 juin 2013 - 23 h 49 min
Génial ! Il fallait y penser !